PN16

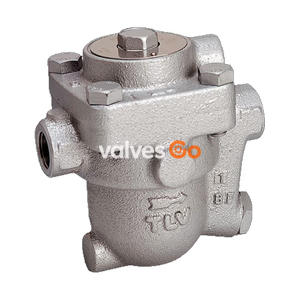
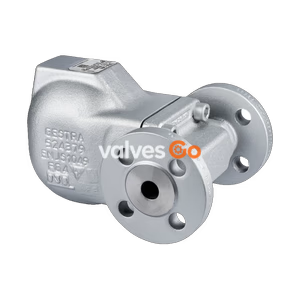
TLV J6S-X stainless steel free float steam trap with thermostatic air venting and three-point seating for medium-size process equipment.
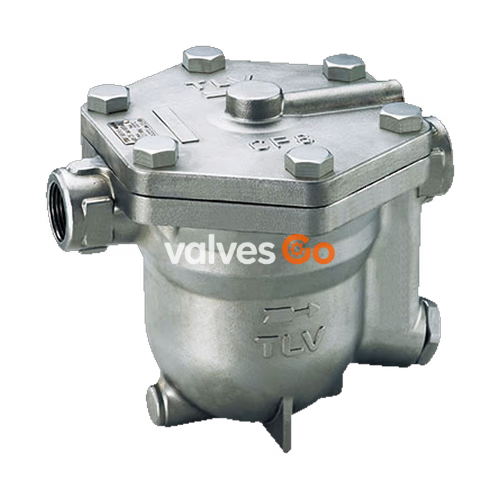
The TLV J6S-X is a reliable and durable stainless steel free float steam trap with three-point seating and thermostatic air venting. Designed for use on medium-size process equipment, tracer lines, unit and process heaters, heating coils, and heat exchangers, it provides tight shut-off and continuous condensate discharge. The trap discharges condensate continuously and automatically at a temperature slightly lower than saturation temperature, accommodating applications up to 2.1 MPaG (300 psig).
Key features include:
WARNING
To avoid malfunctions, product damage, accidents or serious injury, install properly and DO NOT use this product outside the specification range. Local regulations may restrict the use of this product to below the conditions quoted.
| Model | J6S-X |
|---|---|
| Connection | Screwed |
| Size | 1/2", 3/4", 1" |
| Orifice No. | 2, 5, 10, 16, 21 |
| Maximum Operating Pressure (PMO) | 2, 5, 10, 16, 21 barg |
| Maximum Differential Pressure (ΔPMX) | 2, 5, 10, 16, 21 bar |
| Maximum Operating Temperature (TMO) | 220 °C |
| Subcooling of X-element Fill | up to 6 °C |
| Type of X-element | C6 |
PRESSURE SHELL DESIGN CONDITIONS (NOT OPERATING CONDITIONS):
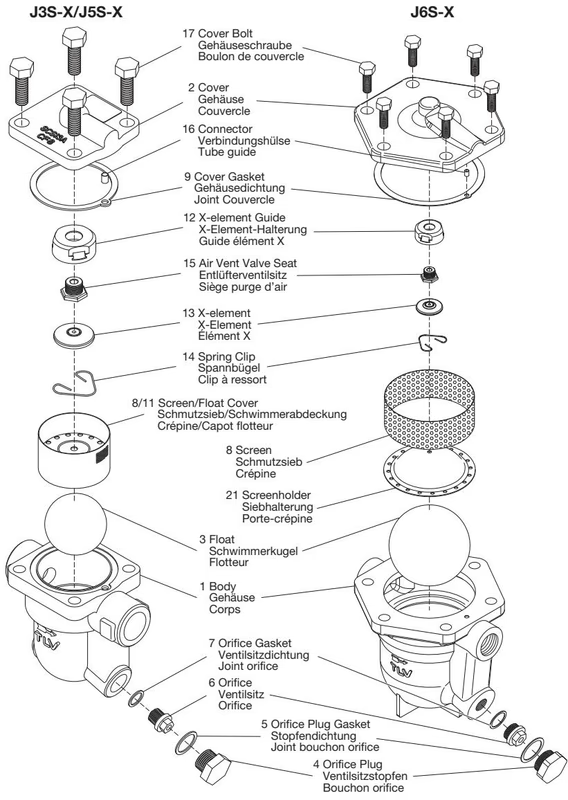
| No. | Description | Material | DIN* | ASTM/AISI* |
|---|---|---|---|---|
| 1 | Body | Cast Stainl. Stl. A351 Gr.CF8 | 1.4312 | — |
| 2 | Cover | Cast Stainl. Stl. A351 Gr.CF8 | 1.4312 | — |
| 3 | Float | Stainless Steel SUS316L | 1.4404 | AISI316L |
| 4 | Orifice | — | — | — |
| 5 | Orifice Gasket | Stainless Steel SUS316L | 1.4404 | AISI316L |
| 6 | Orifice Plug | Cast Stainl. Stl. A351 Gr.CF8 | 1.4312 | — |
| 7 | Orifice Plug Gasket | Stainless Steel SUS316L | 1.4404 | AISI316L |
| 8 | Screen inside/outside | Stainless Steel SUS430/SUS304 | 1.4016/1.4301 | AISI430/AISI304 |
| 9 | Screen Holder | Stainless Steel SUS304 | 1.4301 | AISI304 |
| 10 | Cover Gasket | Fluorine Resin PTFE | PTFE | PTFE |
| 11 | Cover Bolt | Stainless Steel SUS304 | 1.4301 | AISI304 |
| 12 | X-element | Stainless Steel | — | — |
| 13 | Spring Clip | Stainless Steel SUS304 | 1.4301 | AISI304 |
| 14 | X-element Guide | Stainless Steel SUS304 | 1.4301 | AISI304 |
| 15 | Air Vent Valve Seat | Stainless Steel SUS420F | 1.4028 | AISI420F |
| 16 | Connector | Stainless Steel SUS416 | 1.4005 | AISI416 |
| 17 | Nameplate | Stainless Steel SUS304 | 1.4301 | AISI304 |
| 18 | Drain Plug Gasket** | Stainless Steel SUS316L | 1.4404 | AISI316L |
| 19 | Drain Plug** | Stainless Steel SUS303 | 1.4305 | AISI303 |
* Equivalent materials. ** Option.
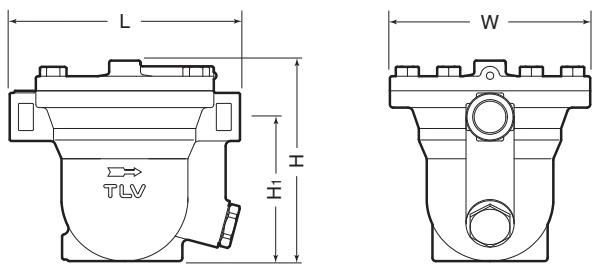
| Size | L (mm) | H (mm) | H1 (mm) | W (mm) | Weight (kg) |
|---|---|---|---|---|---|
| 1/2" | 220 | 192 | 138 | 191 | 9.5 |
| 3/4" | 220 | 192 | 138 | 191 | 9.5 |
| 1" | 220 | 192 | 138 | 191 | 9.5 |
BSP DIN 2999, other standards available.
Size 1/2", 3/4"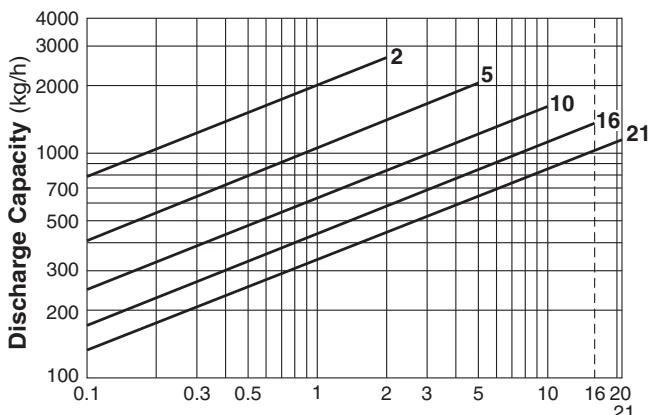
Size 1"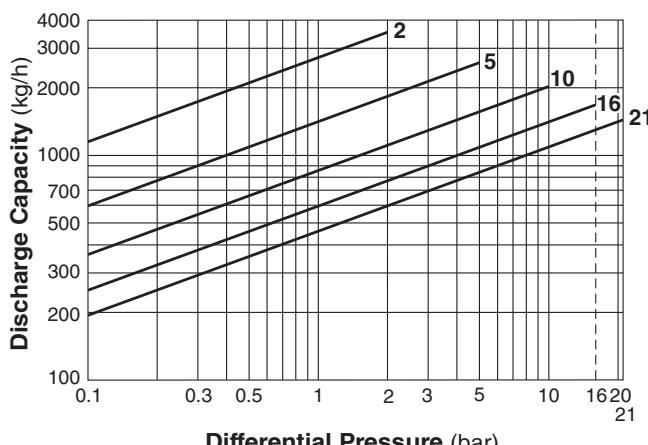
WARNING
Allowable Inclination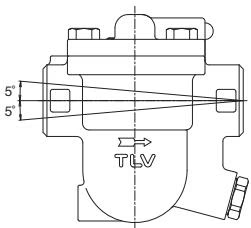
| Requirement | Correct | Incorrect | Reason |
|---|---|---|---|
| Install a catchpot with the proper diameter. | 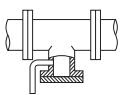 | Diameter is too small. | |
| Make sure the flow of condensate is not obstructed. |  | Diameter is too small and inlet protrudes into pipe. | |
| To prevent rust and scale from flowing into the trap, connect the inlet pipe 25-50 mm (1-2 in.) above the base of the T - pipe. | 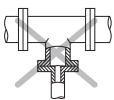 | Rust and scale flow into the trap with the condensate. | |
| When installing on the blind end, make sure nothing obstructs the flow of condensate. | 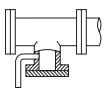 | Condensate collects in the pipe. |
Operational inspections should be performed at least twice per year, or as called for by trap operating conditions. Steam trap failure may result in a temperature drop in the equipment, poor product quality or losses due to steam leakage.
DANGER
NEVER apply direct heat to the float. The float may explode due to increased internal pressure, causing accidents leading to serious injury or property and equipment damage.
WARNING
| Part | Inspection Item |
|---|---|
| Body, Cover | Check inside for damage, dirt, grease, oil film, rust or scale |
| Gaskets | Check for warping or damage |
| X-element | Check for damage |
| Screen | Check for clogging, corrosion or damage |
| Float | Check for deformation, damage, oil film or water inside |
| Air Vent Valve Seat, Orifice | Check for rust, scale, oil film, wear or damage |
| Part & No. | Torque N·m (lbf·ft) | Distance Across Flats mm (in) |
|---|---|---|
| Cover Bolt 17 | 110 (81) | 22 (7/8) |
| Air Vent Valve Seat 15 | 35 (26) | 19 (3/4) |
| Orifice Plug 4 | 180 (130) | 38 (1 1/2) |
| Orifice 6 | 140 (100) | 17 (21/32) |
| Drain Plug** 20 | 35 (26) | 21 (13/16) |
** Option. If drawings or other special documentation were supplied for the product, any torque given there takes precedence over values shown here.
| Part & No. | Disassembly | Reassembly |
|---|---|---|
| Cover Bolt 17 | Use a wrench to remove | Coat threads with anti-seize and tighten to the proper torque |
| Cover 2 | Lift up the cover | Align the cover with the connector to attach the cover |
| Connector 16 | Remove the connector | Insert the connector |
| Cover Gasket 9 | Remove gasket only if worn or damaged | Replace with a new gasket only if worn or damaged |
| Drain Plug* 20 | Use a wrench to remove | Coat threads with anti-seize, and tighten to the proper torque |
| Drain Plug Gasket* 19 | Remove and clean sealing surfaces | Replace with a new gasket, coat surfaces with anti-seize |
| Spring Clip 14 | Squeeze the spring clip to remove it from the guide | Squeeze the spring clip and insert it into the X-element guide |
| X-element 13 | Remove from the X-element guide | Make sure the X-element is not upside down |
| Air Vent Valve Seat 15 | Use a wrench to remove | Coat threads with anti-seize and tighten to the proper torque |
| X-element Guide 12 | Remove without bending | Fix with Air Vent Valve Seat and make sure the X-element can be inserted smoothly |
| Screen 8 | Lift straight up and out while turning | Place on the screen holder, making sure the top of the screen does not stick up out of the body |
| Screen Holder 21 | Remove without bending | Place on the ledge inside the body, making sure the rounded side is on top |
| Float 3 | Remove, being careful not to scratch its polished surface | Insert into body, being careful not to scratch its polished surface |
| Orifice Plug 4 | Use a wrench to remove | Coat threads with anti-seize and tighten to the proper torque |
| Orifice Plug Gasket 5 | Remove gasket only if worn or damaged | Replace with a new gasket only if worn or damaged |
| Orifice 6 | Use a wrench to remove | Coat threads with anti-seize, and tighten to the proper torque |
| Orifice Gasket 7 | Remove the gasket and clean sealing surfaces | Replace with a new gasket, coat surfaces with anti-seize |
The seal on the threaded plugs/holders found on TLV products is formed by a flat metal gasket. There are various installation orientations for the gaskets, such as horizontal, diagonal and downward, and the gasket may be pinched in the thread recesses during assembly.
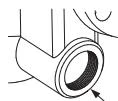
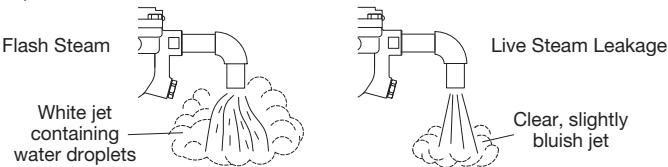
A visual inspection can be carried out to aid in determining the necessity for immediate maintenance or repair, if the trap is open to atmosphere. If the trap does not discharge to atmosphere, use diagnostic equipment such as TLV TrapMan or TLV Pocket TrapMan.
(When conducting a visual inspection, flash steam is sometimes mistaken for steam leakage. For this reason, the use of a steam trap diagnostic instrument is highly recommended.)
If the expected performance is unachievable after installation of the steam trap, check the following points to take appropriate corrective measures.
| Problem | Cause | Remedy |
|---|---|---|
| No condensate is discharged (blocked) or discharge is poor | Float is damaged or filled with condensate | Replace the float |
| Orifice, screen or piping is clogged with rust or scale | Clean | |
| Steam-locking has occurred | Blowdown through the bypass or close the trap inlet valve and allow the trap to cool | |
| X-element is damaged | Replace the X-element | |
| The trap operating pressure exceeds the maximum specified pressure, or there is insufficient pressure differential between the trap inlet and outlet | Compare specifications and actual operating conditions | |
| Steam is discharged or leaks from the trap outlet (blowing) (steam leakage) | Rust and scale have accumulated around the orifice or under the float | Clean |
| Orifice is damaged | Replace the orifice | |
| Float is deformed or coated with scale | Clean or replace the float | |
| Trap is installed above the maximum allowable inclination angle | Correct the installation | |
| Vibration of trap occurs | Lengthen inlet piping, then fasten it securely | |
| The X-element is damaged, or clogged with rust or scale | Clean or replace the X-element | |
| Steam leaks from a place other than the trap outlet | Deterioration of or damage to gaskets | Replace with new gaskets |
| Improper tightening torque for cover was used | Tighten to the proper torque | |
| Float is frequently damaged | Water hammer occurs | Examine the piping for problems that can cause water hammer |
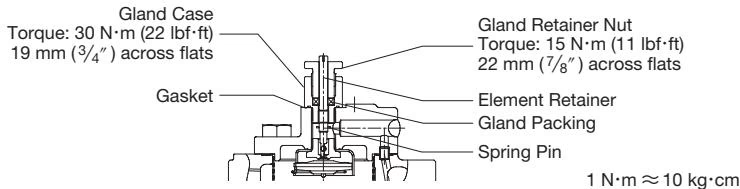
WARNING
Use heat-resistant gloves when operating the lock release valve and keep all body parts well clear of the product. Failure to do so could result in burns, other injury or damage from the blowing of small amounts of steam and condensate.
Use on equipment where steam locking/air binding, which slows the discharge of condensate and reduces equipment efficiency, tends to occur (cylindrical dryers, air fin heater, etc.).