
Skip to content
Standard Fill (STD)Complete Assembly

Spirax Sarco BPT13 / AV13 Steam Trap Maintenance Kit "E" STD / NTS(G) (1225680 / 1225681)

Spirax Sarco BPT13 maintenance kits: "E" STD (1225680) and NTS(G) (1225681). Each includes capsule, seat, spring, spacer plate, gaskets, and strainer screen for BPT13 steam traps.
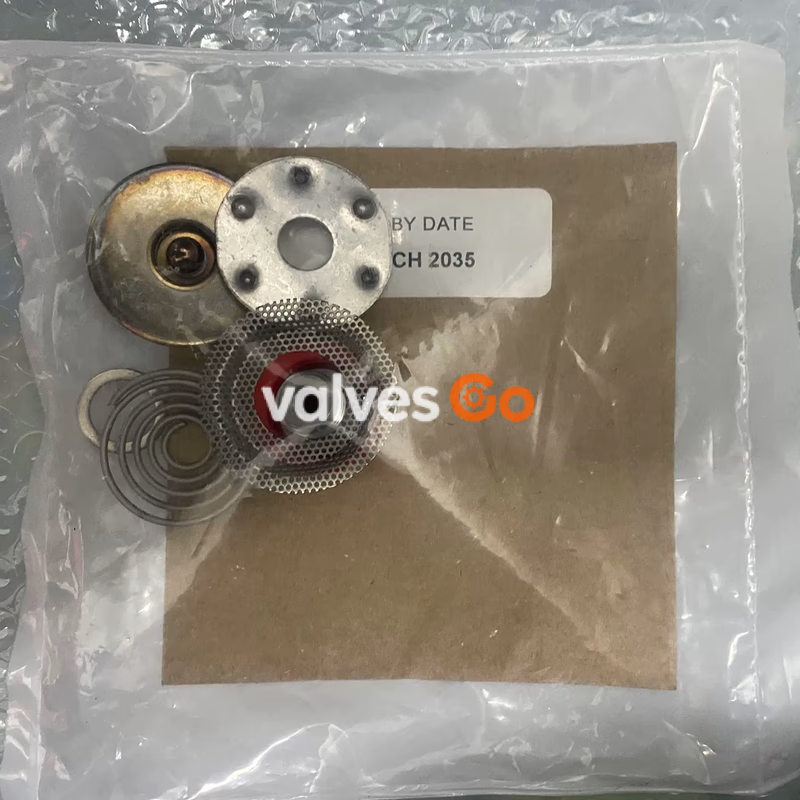
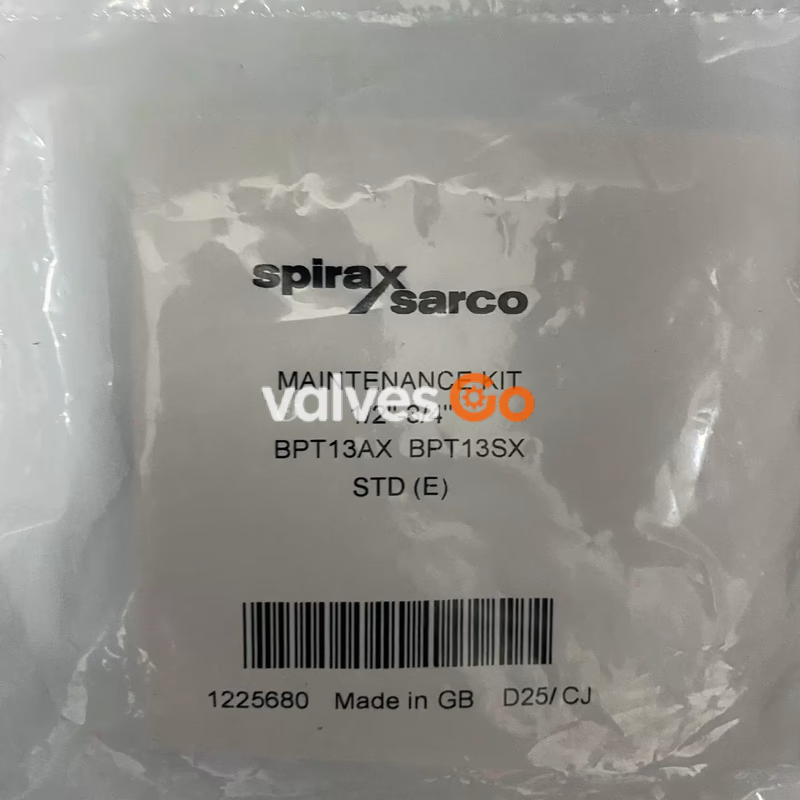
Spirax Sarco BPT13 Maintenance Kit "E" STD (1225680) for Balanced Pressure Thermostatic Steam Traps

Spirax Sarco BPT13 maintenance kits are complete capsule and seat assemblies designed for the BPT13 series of balanced pressure thermostatic steam traps, providing all necessary internal replacement components to restore the steam trap to optimal working condition. Two variants are covered on this page:

  • "E" STD (part number 1225680): standard fill capsule, designed to operate at approximately 12 °C (53 °F) below steam saturation temperature.
  • NTS(G) (part number 1225681): capsule and seat assembly for the NTS(G) fill type.

Both maintenance kits are compatible with the following Spirax Sarco brass-bodied steam trap models: BPT13A, BPT13AX, BPT13S, BPT13SX, BPT13UA, BPT13UAX, BPT13US, and BPT13USX, as well as the AV13 air vent valve.

Kit Contents

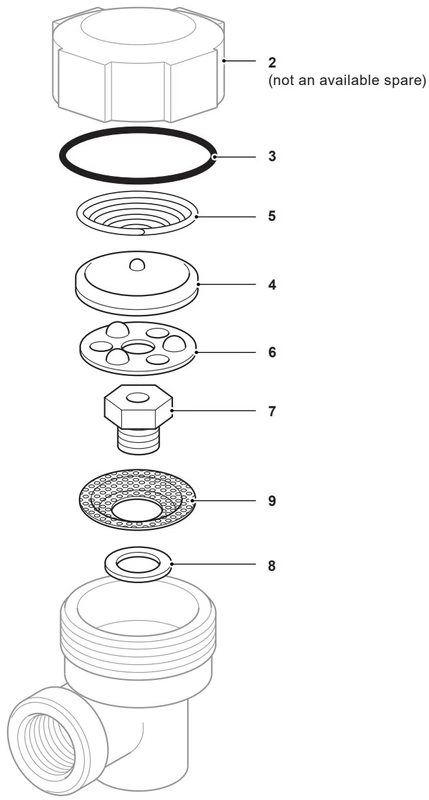
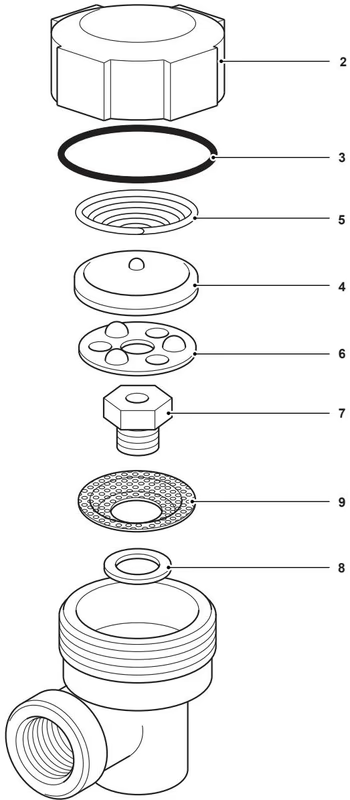
The maintenance kit includes the following replacement parts (referencing the standard spare parts diagram):

Item No.Description
3'O' ring (for current models) or Cap gasket (for earlier models)
4Capsule ("STD" fill)
5Spring
6Spacer plate
7Valve seat
8Valve seat gasket
9Strainer screen

Spirax Sarco BPT13 maintenance kit spare parts diagram

Maintenance and Installation Instructions

WARNING

Before undertaking any maintenance on the trap, it must be isolated from both the supply line and return line, and any pressure allowed to safely normalise to atmosphere. The trap should then be allowed to cool. When reassembling, ensure that all joint faces are clean.
How to fit a new capsule and seat

  1. Remove the cap (2) using a spanner.
  2. Lift out the spring (5), capsule (4) and spacer plate (6).
  3. Unscrew the valve seat (7).
  4. Remove the strainer screen (9) if present and the seat gasket (8).
  5. Fit a new seat gasket (8) and clean the strainer screen (9) before replacing, or replace the strainer screen with the new one provided in the kit.
  6. Screw in a new valve seat (7). Use a small amount of anti-seize compound on the threads and tighten to the recommended torque (see table below).
  7. Drop in the new spacer plate (6) ensuring it is located centrally on the valve seat (7). Note: Early spacer plates are unidirectional and must be fitted with the highest points uppermost. This does not apply to later models, which can be fitted either way up.
  8. Fit the new capsule (4) and spring (5) ensuring that the conical spring is positioned with the narrow end pointing downwards in contact with the capsule.
  9. Screw on the cap (2) using a new 'O' ring (3) assembled into the groove in the top of the cap, or in older models using a new gasket. Note: The spares pack contains 2 sizes of 'O' ring; use the correct 'O' ring as explained in the note contained within the package. Tighten to the recommended torque.

Spirax Sarco BPT13 exploded view showing capsule and seat assembly

ItemPartSeal TypeSizeTorque (N m)
2Cap'O' ring50 A/F50 - 60
2CapGasket50 A/F90 - 110
7Seat-17 A/F35 - 40